 d3008a - Focused on Christmas tree in the foreground |
||||||||||
|
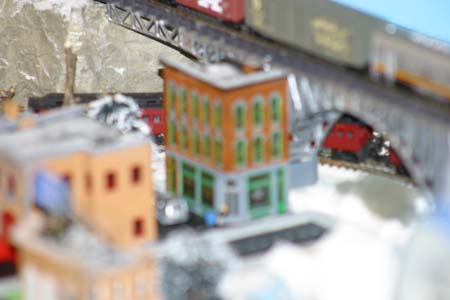
Helicon Focus Software for improving depth of field in close-up photographs One problem with close-ups photography is the lack of "depth of field" - only a small part of the picture is in focus. As I was thinking about taking pictures the final page of my Winter Layout section, the November 2007 issue of Model Railroader came. It contained an article, "Improving Photographic Depth of Field," by Lance Mindheim, which described software solutions to the depth of field problem. He described two downloadable programs which would take a series of digital photos, each taken with a slightly different point of focus, and combine them into one in-focus image. The two programs were Combine Z5 (freeware) and Helicon Focus (a one-month free trial and a cost of $30 for a one year license or $115 for a permanent license. The author seemed to think Helicon Focus was the easier program to use, so I downloaded, tried it out, and purchased the program. To use the program, take a series of photos each focused at a different point in the scene. Set your camera lens to Manual Focus then start close and work your way, image by image, towards the back. Make sure that your camera is mounted on a tripod so that you get minimum movement between exposures. A cable-release or a timer for the shutter would help here too. Because my Winter Layout is in a suitcase on my dining room table I found it necessary to use my 75 - 300 mm zoom telephoto lens in order to get my tripod set up and still get "close-up" photos. The photos d3008a - d3008e at the right are the series of photos that Helicon Focus combined to make the final image. Notice how each is focused at a slightly different point from front to back in the scene. After the photos of one scene are taken, download them from your camera to your computer into a folder of their own. Run Helicon Focus. Use the "Browse Folder Tree" icon Under the "Run" icon at the right of the screen to find your folder of images. Click the box at the right of each file name to produce a red check mark for each image, then click "Run" at the top of the column. The images are processed in a minute or so and you will see the default file name assigned to the image appear in the box below "Output 1 of 20". Click the "Saving" tab at the top of the screen, click on the "Save to Disk" button, then select a location for the file in the "Save As" window that opens. Click "Save" and that's that. You can rename the files if you want and move them to some permanent folder. You may want to just delete the files that were used to make the final image. As you can see from the final image, d3008, the software produces an image with great depth of field. |
||||||||||
 d3008b - Focused on the street |
||||||||||
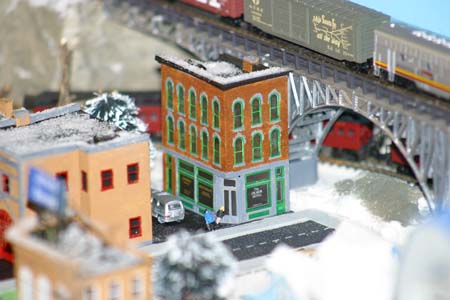 d3008c - Focused on the front of the Gilmor Hotel |
||||||||||
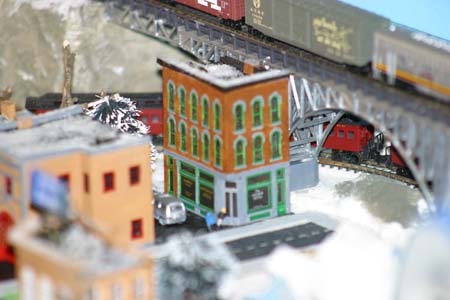 d3008d - Focused on the back portion of the Gilmor Hotel |
||||||||||
 d3008 - Combined image with most of the scene in focus |
 d3008e - Focused behind the Gilmor Hotel |
|||||||||